

This past weekend my little sister called me up and said she wanted to come over and hang with me on Saturday, maybe hit up some yard sales. We found some AWESOME things. One of the things we found were unfinished wood crafts for 10 cents each! I picked up a few stars even though I didn't have anything in mind for them.
My sister is moving to a new house next week and was looking for items to decorate it and furniture pieces for storage. When we got home she was telling me some of her decorating plans. She showed my a picture of these Star Bookends on her phone
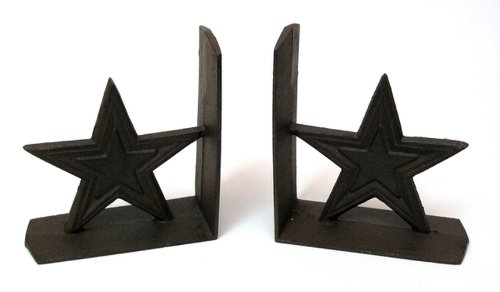
I told her "We could make you some similar to that out of wood....Hey we could use some of the stars I got today. Let's go make some!"
I had a bunch of scrap pieces of 2x6's. I cut them to the dimensions we wanted them.

I put wood glue on the adjoining seam.

And then attached them with a nail gun.

I put wood glue on the points of the star, and then attached it with a brad nailer.

I couldn't think of a good way besides this. I angled the nail just about as straight as I could. Since a little poked out. I did them all from them same side, so that could be the back. I made sure to do them on the opposite side of the other one.

Then I wiped off any extra glue.
And it was done! Ready for paint!

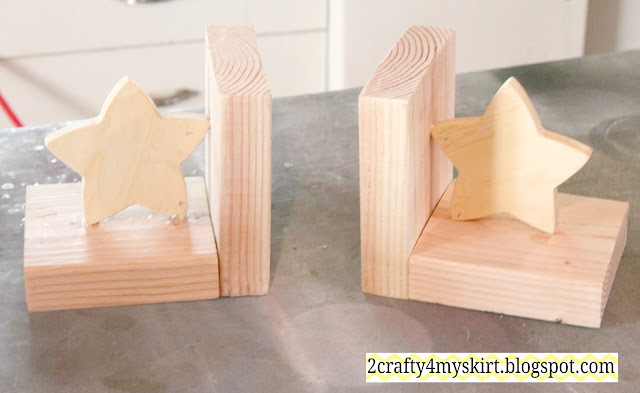
I painted them with the same Hesston Equipment paint that I used on my Front Entry Gate.

All done! Cost me 20 cents. And some scraps and paint I already had sitting around. And they probably took me 20 minutes to make!
I LOVE a good Knock-off!

Never miss a new post!
My sister is moving to a new house next week and was looking for items to decorate it and furniture pieces for storage. When we got home she was telling me some of her decorating plans. She showed my a picture of these Star Bookends
on her phoneI told her "We could make you some similar to that out of wood....Hey we could use some of the stars I got today. Let's go make some!"
I had a bunch of scrap pieces of 2x6's. I cut them to the dimensions we wanted them.

I put wood glue on the adjoining seam.

And then attached them with a nail gun.

I put wood glue on the points of the star, and then attached it with a brad nailer.

I couldn't think of a good way besides this. I angled the nail just about as straight as I could. Since a little poked out. I did them all from them same side, so that could be the back. I made sure to do them on the opposite side of the other one.

Then I wiped off any extra glue.
And it was done! Ready for paint!


I painted them with the same Hesston Equipment paint that I used on my Front Entry Gate.

All done! Cost me 20 cents. And some scraps and paint I already had sitting around. And they probably took me 20 minutes to make!
I LOVE a good Knock-off!

Never miss a new post!

Check out 2 Crafty 4 My Skirt on Facebook for items that you can custom order or just to stay updated on new projects!
This Post is Sponsored by: Alese Stewart Photography, Reclaim-ologist and Other Crafty Chicks, Shabby Apple Dresses, My Own Labels
 , mymemories.com
 , LittleTikes.com
 , Little Giant Ladders
 , Leonisa
Linking to: Tip Junkie, Savy Southern Style Between Naps on the Porch, and these other awesome link parties.


 . I just used the board as a guide and cut right up the side of it.


 and told me I should try that! I definately will next time!


